Announcement

Collapse
No announcement yet.

Lenovo TS440 to Supermicro X9DAi Conversion

Collapse
X
 
  • Filter
  • Time
  • Show
Clear All
new posts

    Lenovo TS440 to Supermicro X9DAi Conversion

    This build was a bit of a spontaneous one. Someone dropped this off for recycling a while back. HDD's destroyed as per customer request. It was in working condition, I just didn't really know what I was going to do with it. It's a Xeon E5-1220 v3 @ 3.1GHz w/ 8gb RAM....nothing too exciting, no CPU support more than 4 cores and max RAM is 32gb. The case is decently built though.


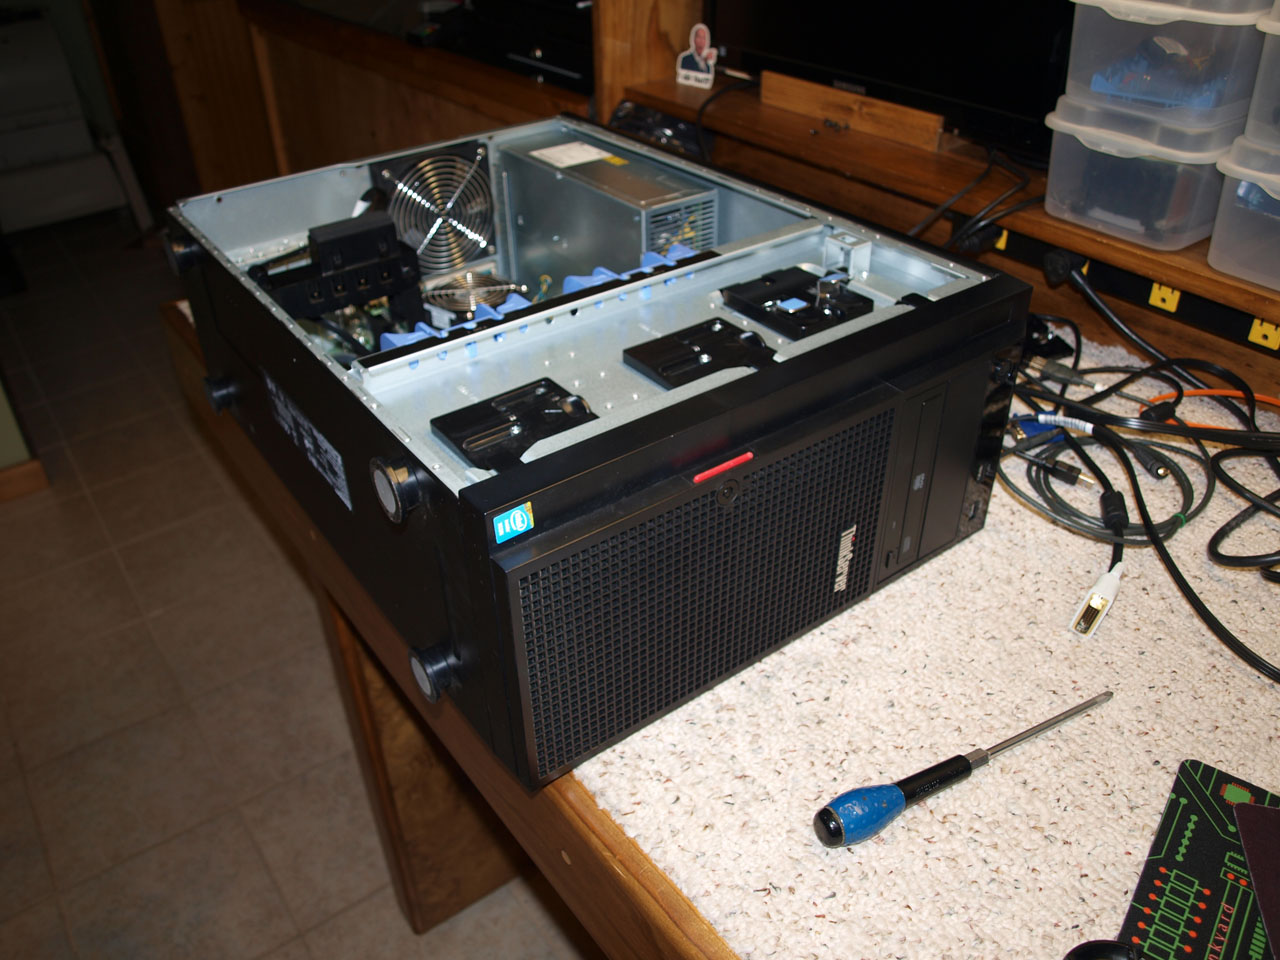
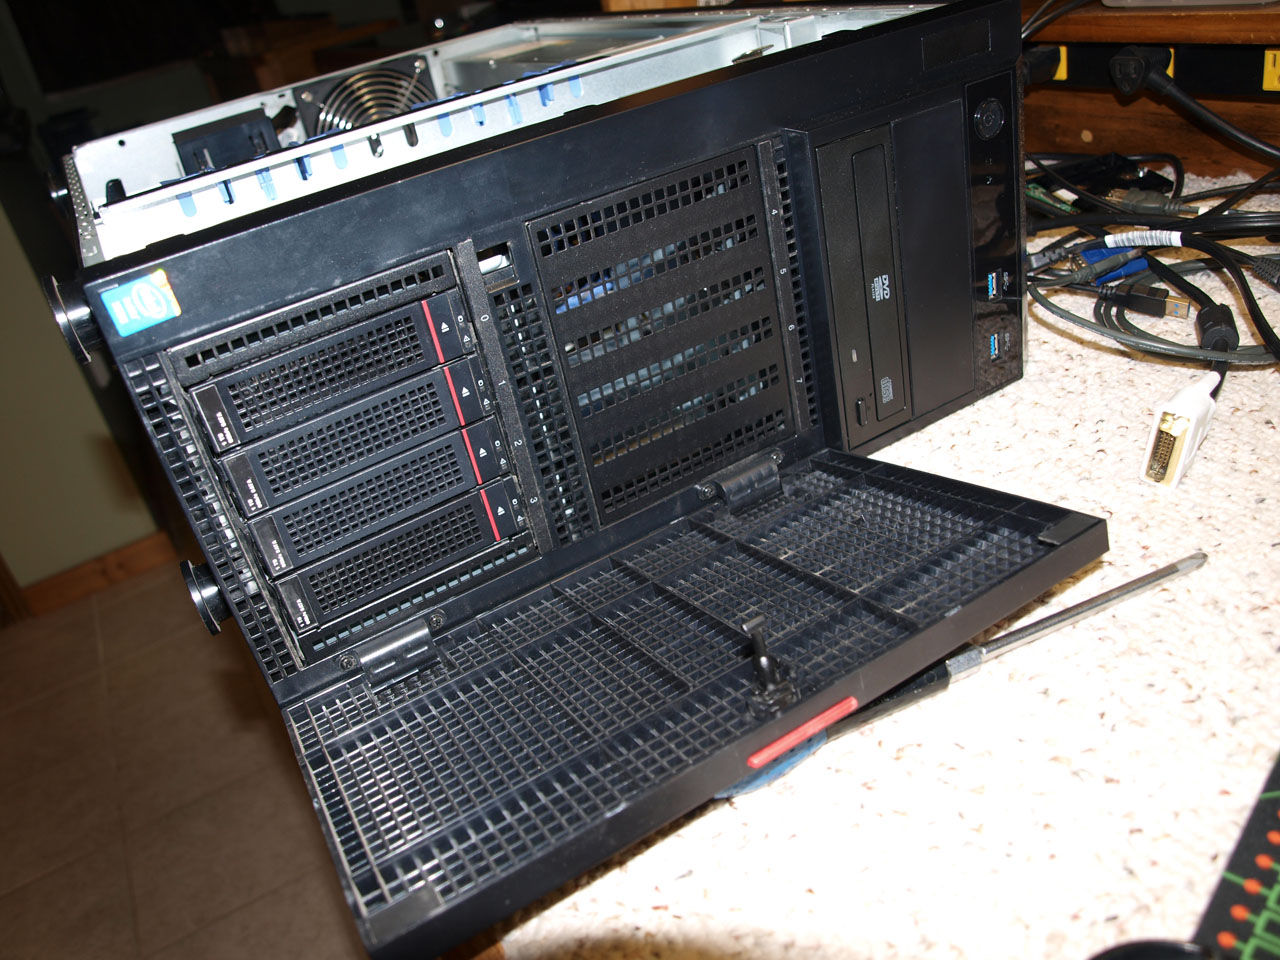
    This Lenovo TS440 was just full of things that absolutely annoyed the shit out of me.

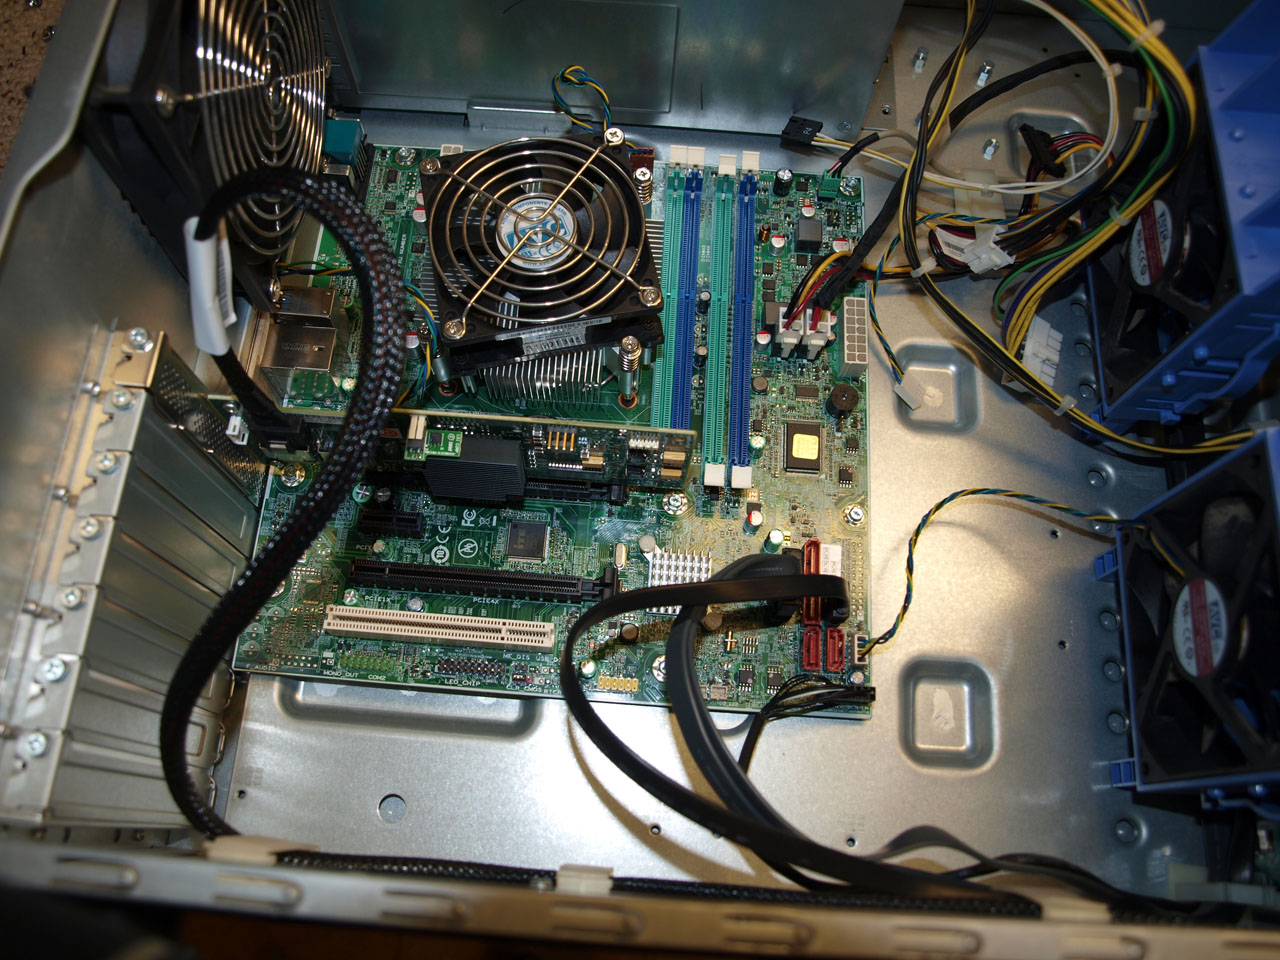
    First up, a micro ATX motherboard in a case made to hold an eATX! WTF! Second, a proprietary PSU with non-standard electrical connectors... We'll just see about all this sillyness!!


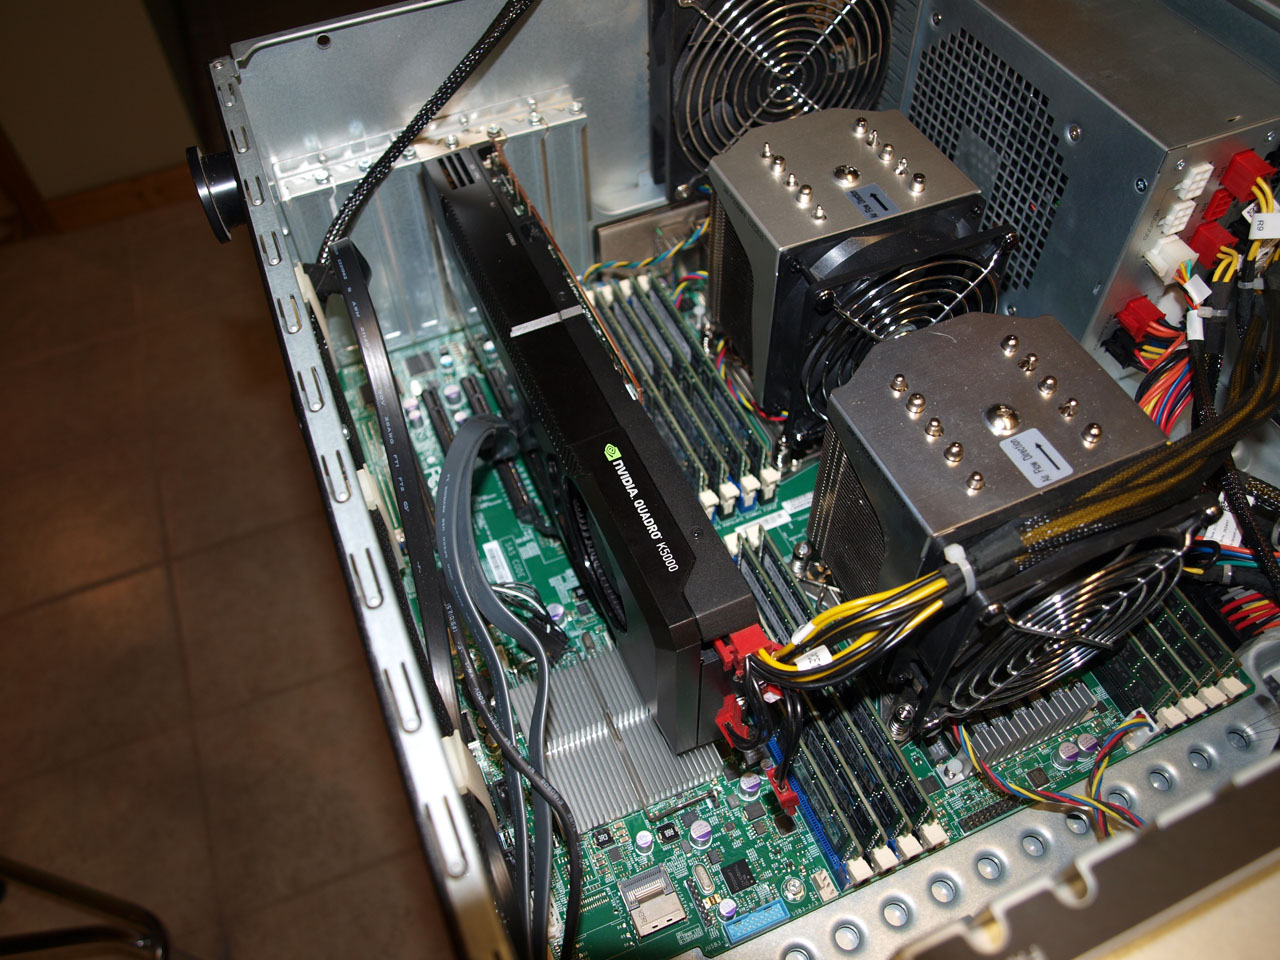
    Enter in the new innards, a X9DAi I've had for a while.


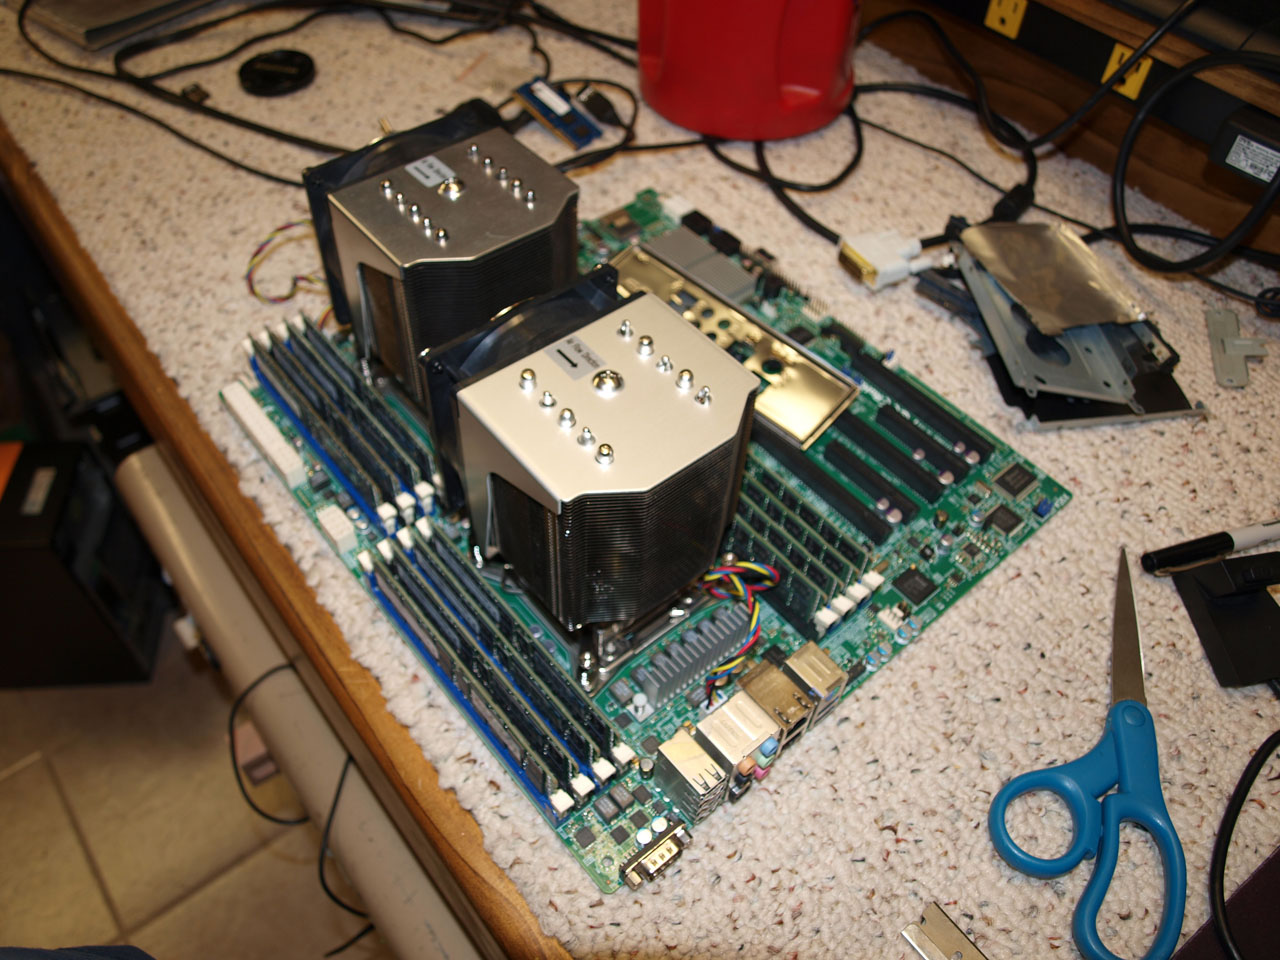
    Installing in this case won't be the tricky part of this build; as this case was made to take an eATX. Repositioned the standoffs and in it goes!


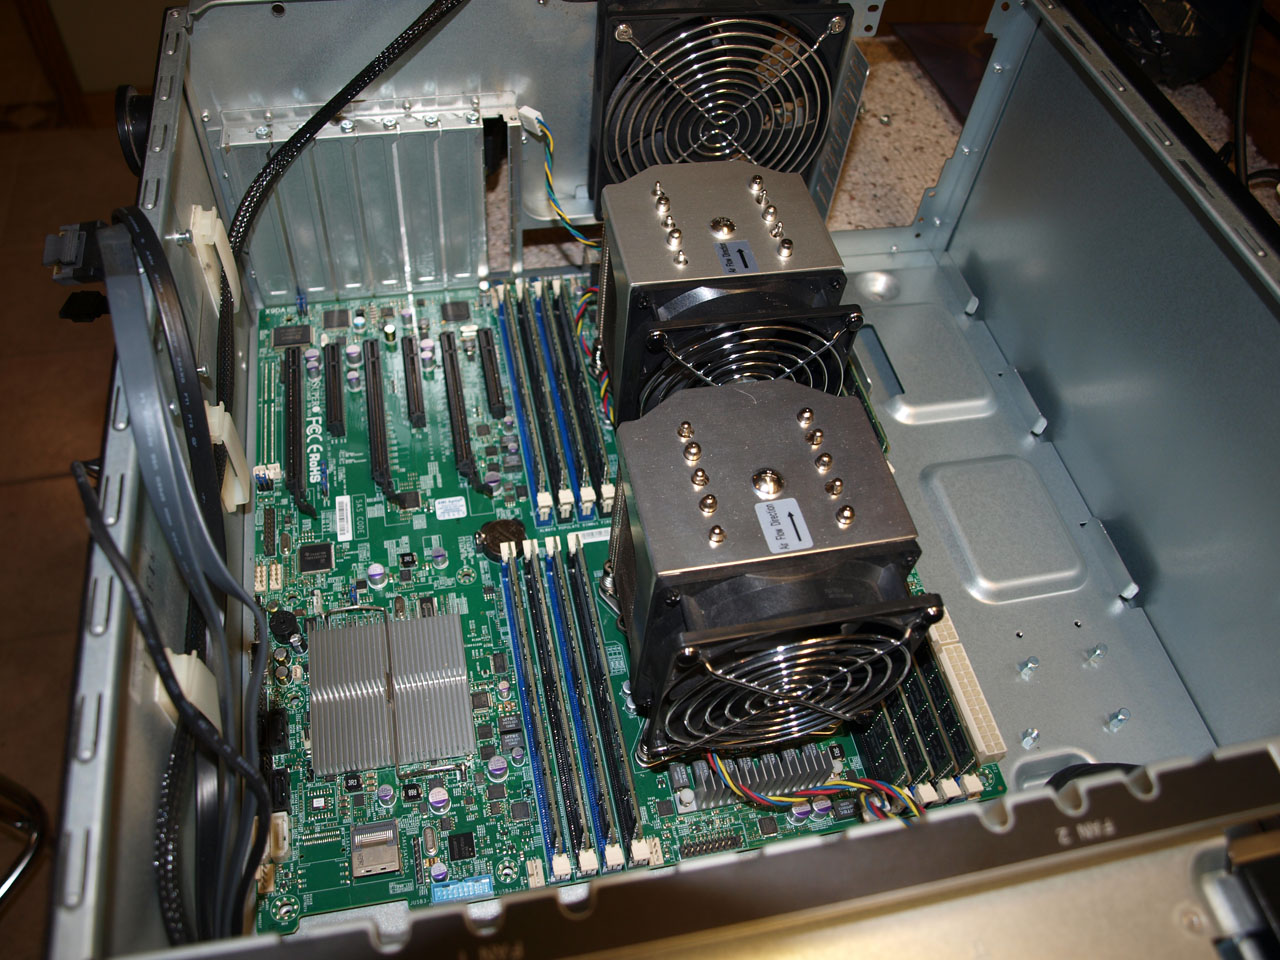
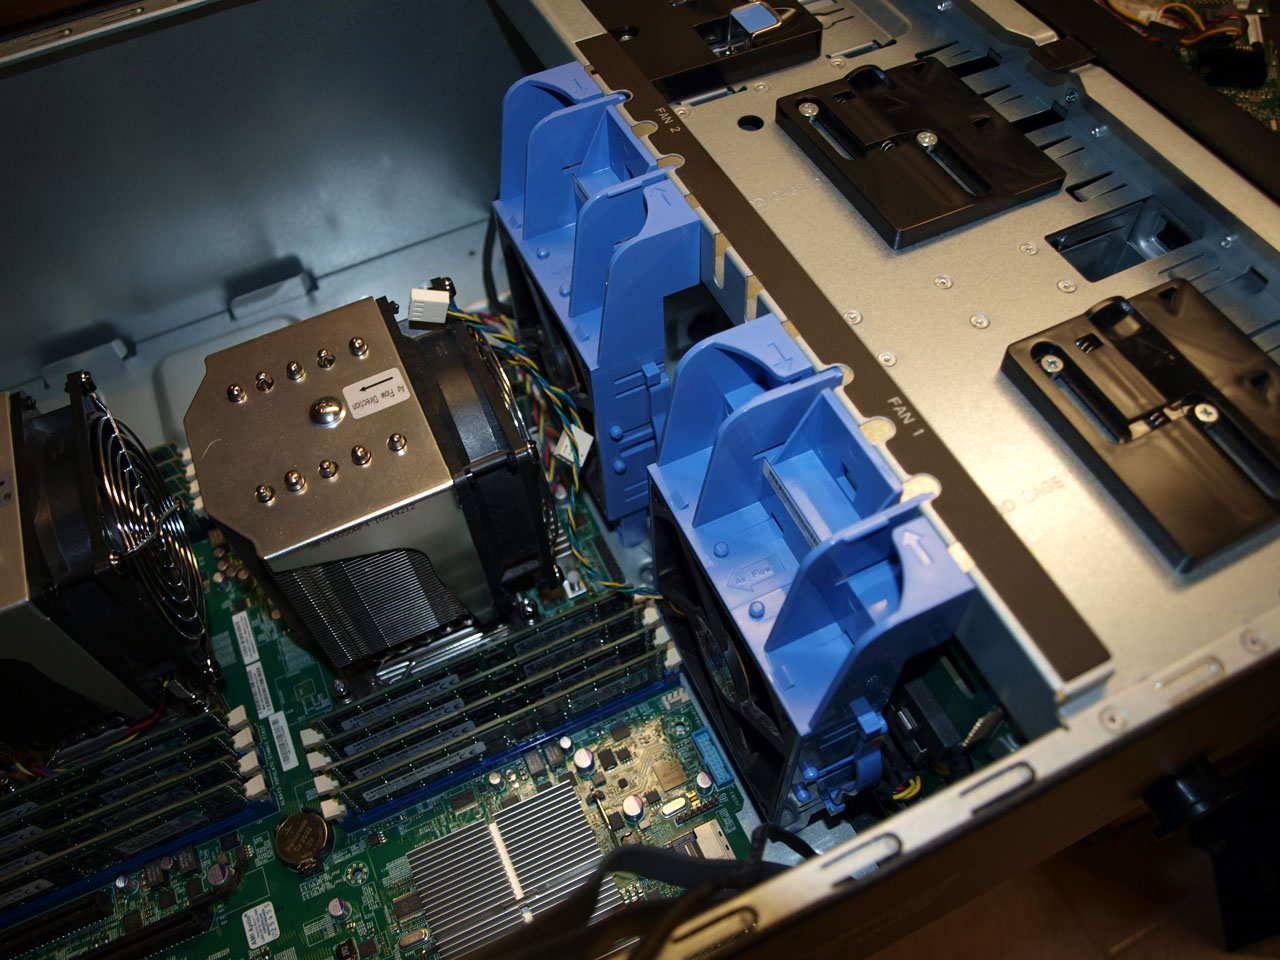
    Midplane fan mounts were my biggest concern, but they cleared by a decent amount.


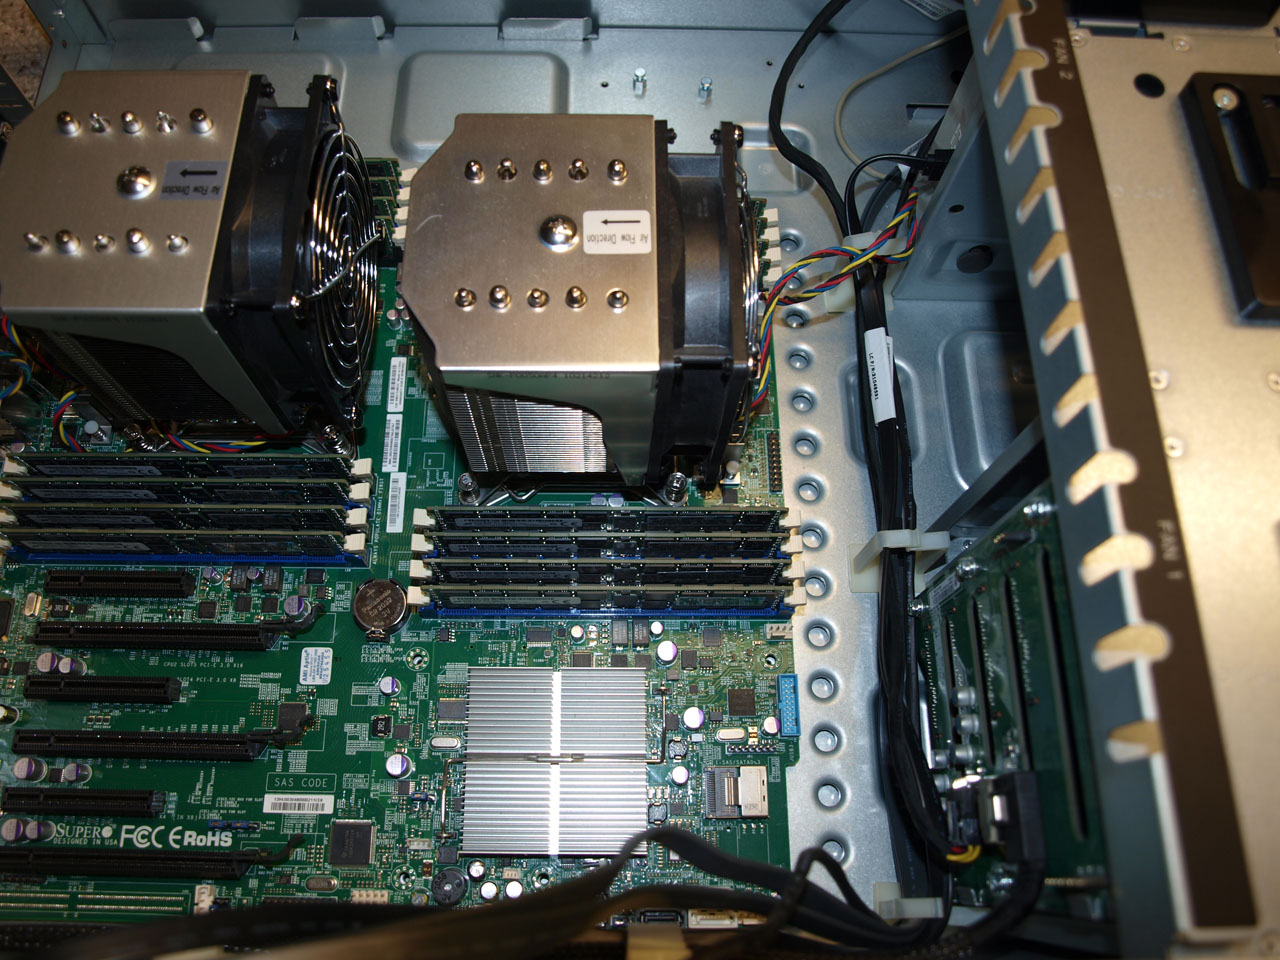
    Don't mind the fan wires, that was just a test fit. They tucked away nice and overall this was a stellar fit in this case.


    IO shield.


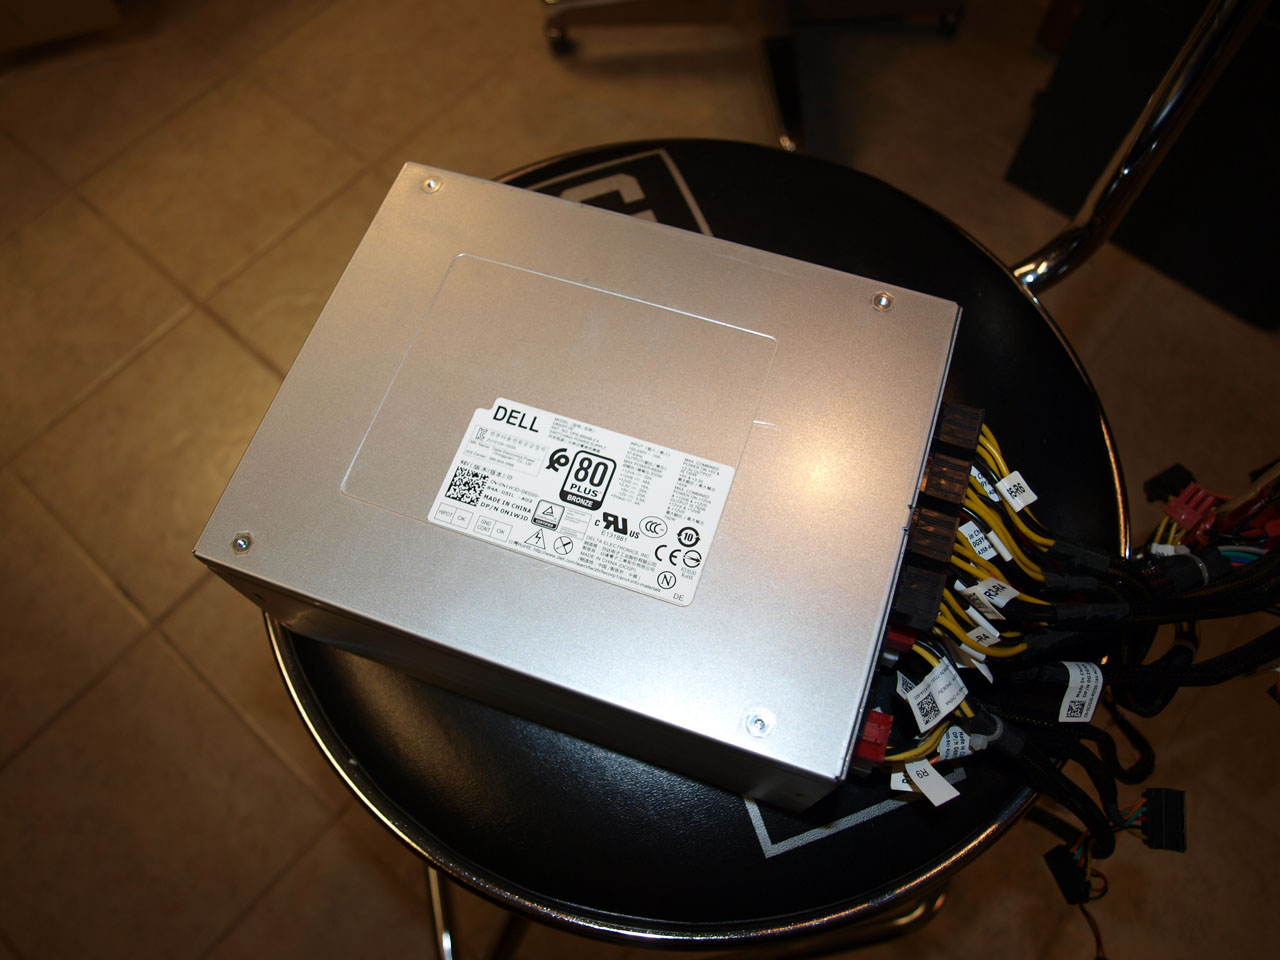
    Now for the power supply.... I couldn't use the one that came with this system.....it was not an ATX by electrical standards (idiotic)....so enter in a Dell D850EF 850W Modular that came out of an Alienware Aurora that had a bad motherboard.


    Installed and a K5500 GPU added, it's the best GPU I've got laying around loose right now.


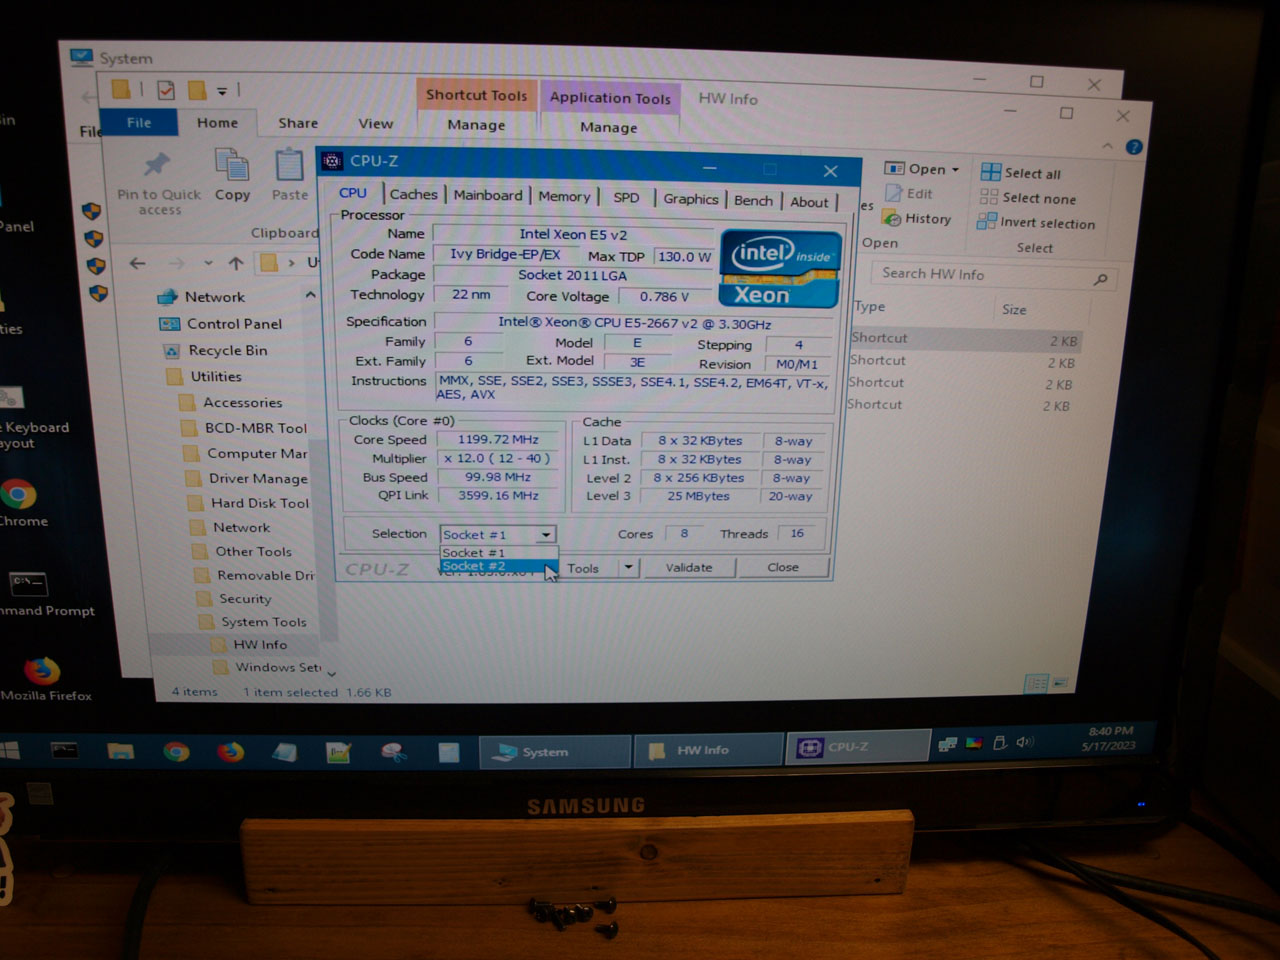
    Now to test fire this.....
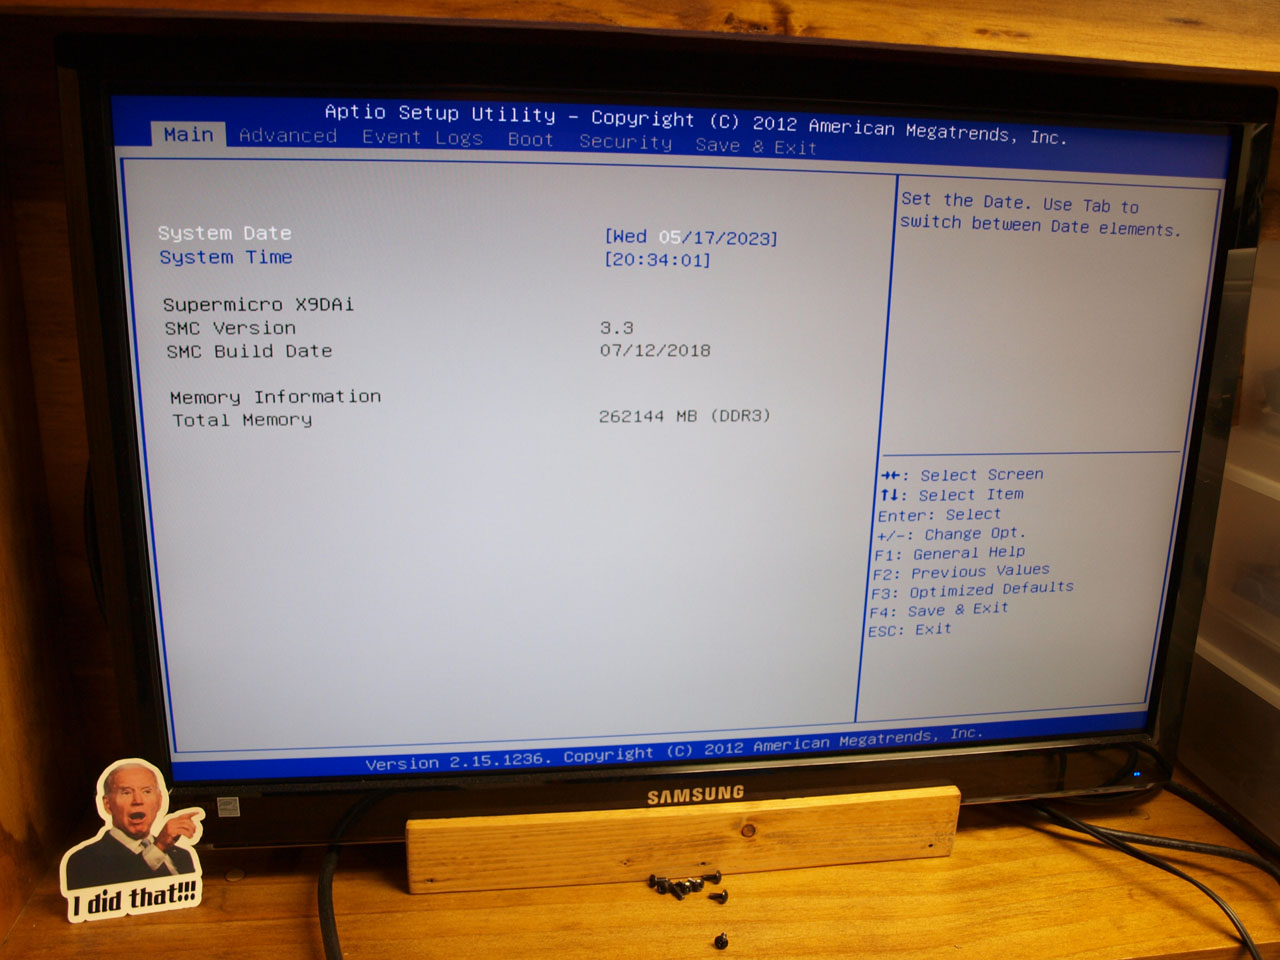
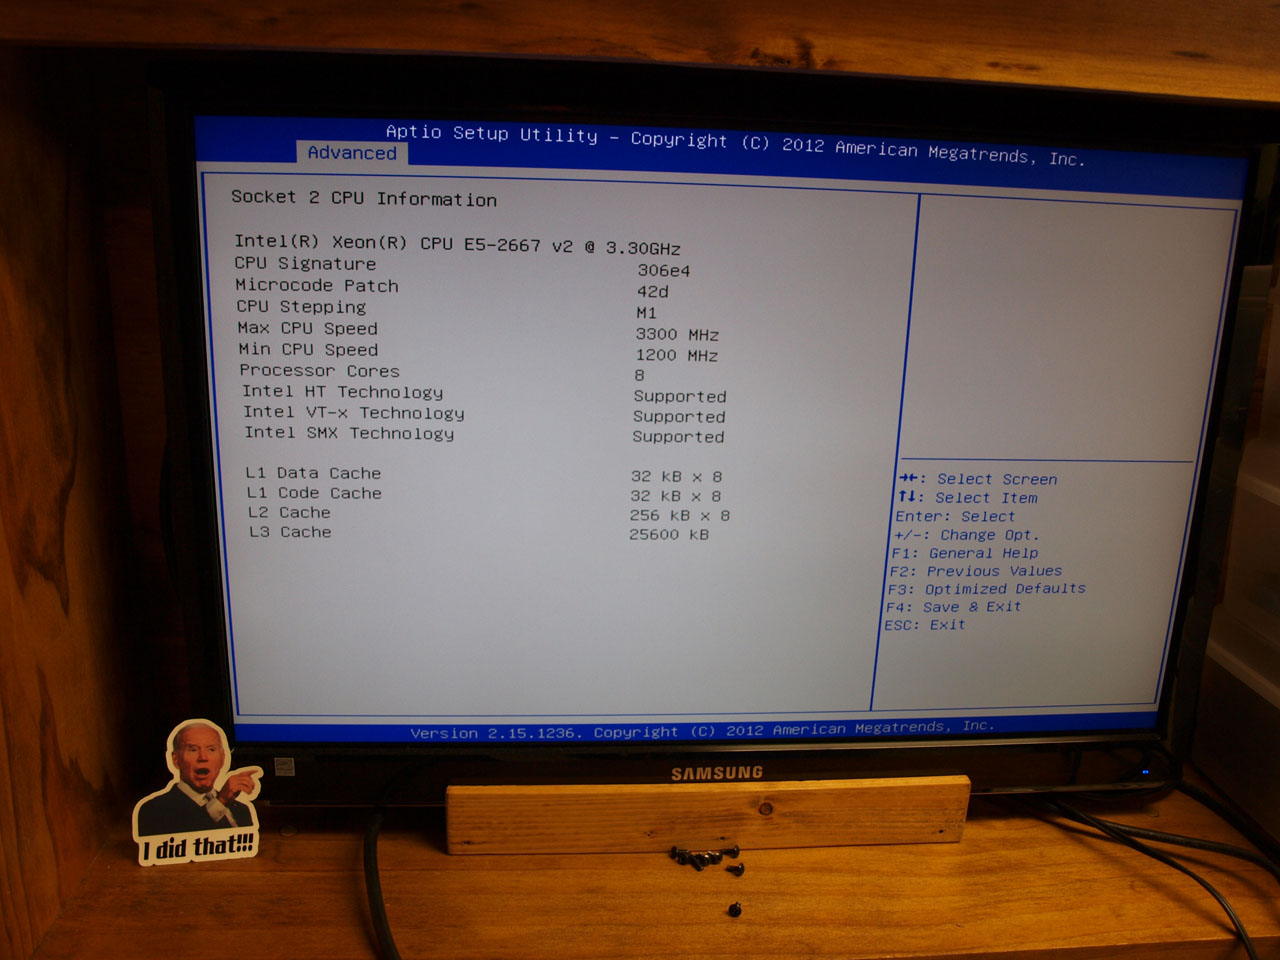
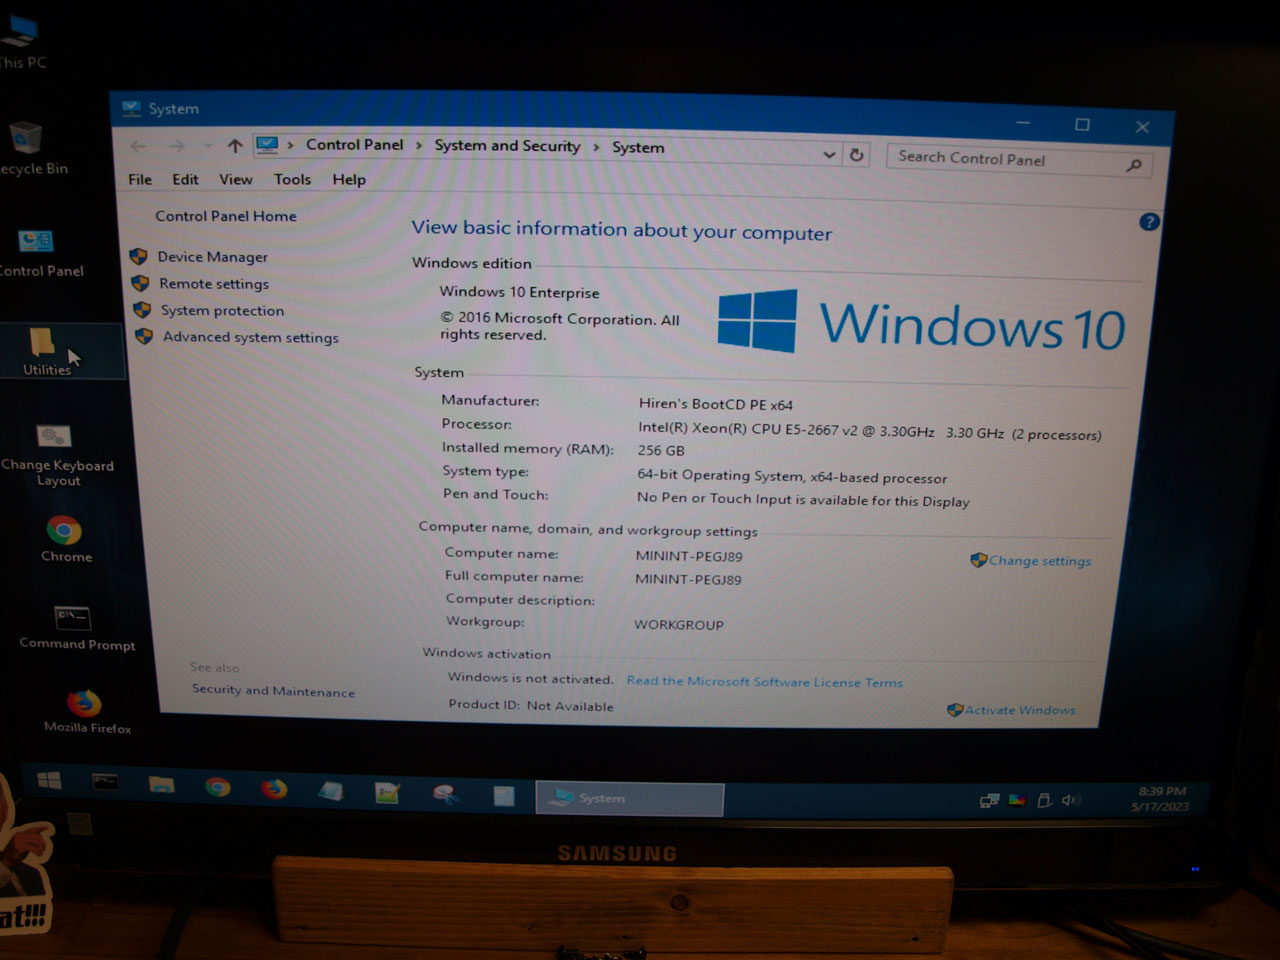


    Booted to Hiren's.


    Looks kinda cute!


    The PSU cables were short, but a nice fit for this case, everything reached......


    Ok, I know what you're thinking....this one went way too quick & smooth....well, not really. Lots of electrical challenges ahead.

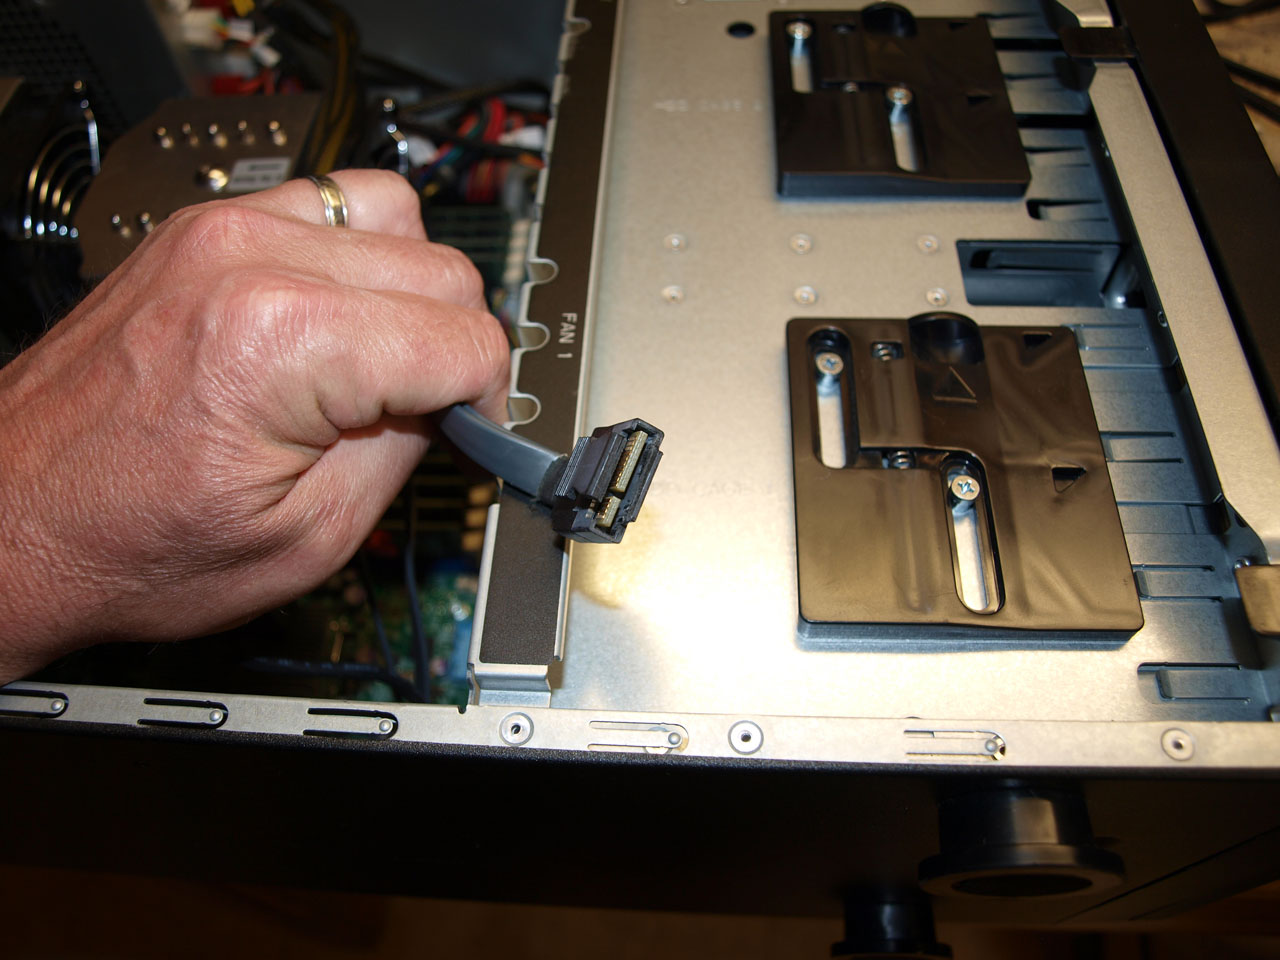
    First one is the USB3 front panel header.....


    .....which plugs into this (this is the original motherboard):


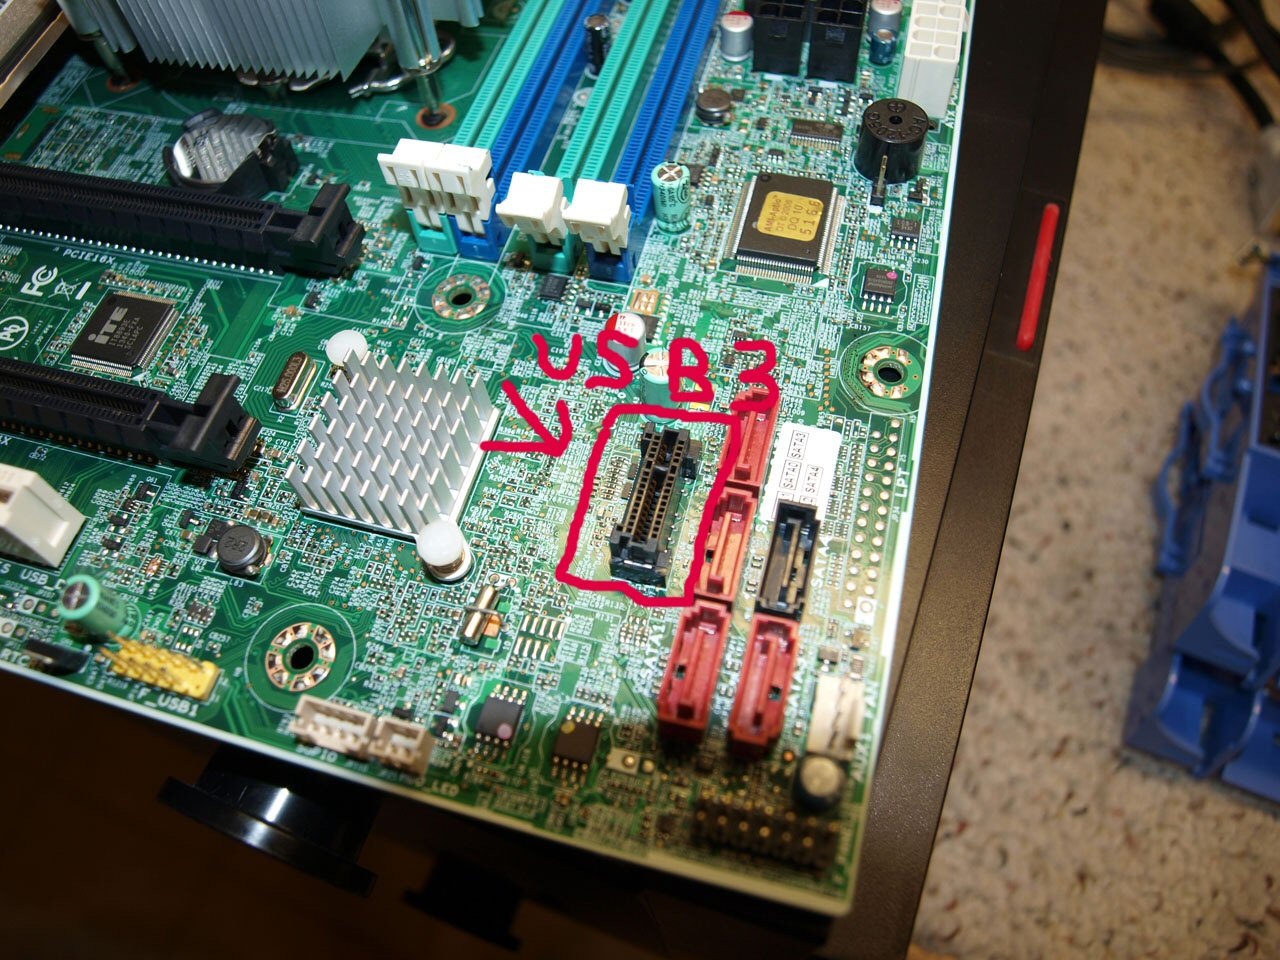
    I have never seen a USB3 connector like this.....so making it interface with a standard 19/20 pin will be a bit of a challenge.

    Also, the RAID backplane power connectors were proprietary to that stupid power supply. I'm sure it's all simple 5v/12v, just have to figure out the pin config. Then there's all the front panel connectors for the buttons & LED's....all wired weird....so this one is nowhere near done.....but not a bad start for a decent workstation.
    Attached Files
    <--- Badcaps.net Founder

    Badcaps.net Services:

    Motherboard Repair Services

    ----------------------------------------------
    Badcaps.net Forum Members Folding Team
    http://folding.stanford.edu/
    Team : 49813
    Join in!!
    Team Stats

    #2
    Re: Lenovo TS440 to Supermicro X9DAi Conversion

    I found this regarding the backplane, hope it helps you:

    https://forums.lenovo.com/t5/ThinkSe...page=1#4602091
    Main rig:
    Gigabyte B75M-D3H
    Core i5-3470 3.60GHz
    Gigabyte Geforce GTX650 1GB GDDR5
    16GB DDR3-1600
    Samsung SH-224AB DVD-RW
    FSP Bluestorm II 500W (recapped)
    120GB ADATA + 2x Seagate Barracuda ES.2 ST31000340NS 1TB
    Delux MG760 case

    Comment


      #3
      Re: Lenovo TS440 to Supermicro X9DAi Conversion

      Boss

      This is very interesting build you come up with some very interesting ideas and I like how you can make them work together
      9 PC LCD Monitor
      6 LCD Flat Screen TV
      30 Desk Top Switching Power Supply
      10 Battery Charger Switching Power Supply for Power Tool
      6 18v Lithium Battery Power Boards for Tool Battery Packs
      1 XBox 360 Switching Power Supply and M Board
      25 Servo Drives 220/460 3 Phase
      6 De-soldering Station Switching Power Supply 1 Power Supply
      1 Dell Mother Board
      15 Computer Power Supply
      1 HP Printer Supply & Control Board * lighting finished it *


      These two repairs where found with a ESR meter...> Temp at 50*F then at 90*F the ESR reading more than 10%

      1 Over Head Crane Current Sensing Board ( VFD Failure Five Years Later )
      2 Hem Saw Computer Stack Board

      All of these had CAPs POOF
      All of the mosfet that are taken out by bad caps

      Comment


        #4
        Re: Lenovo TS440 to Supermicro X9DAi Conversion

        Sad... that an E5-1220 v3 is considered junk nowadays.
        Yes, original HW may only have 8 GB of RAM and 4 core CPU, but that's still plenty decent even today (well, maybe the RAM might be a bit low at 8 GB... though probably more than enough for some version of Linux.)

        The new HW, of course, is in a completely different league. Very nice!

        And yes, IDK why so many companies have started doing this now: install a tiny motherboard into a huge case with a cubic butt-load of proprietary stuff. It's just.... ugh! like you, it just pisses me off.

        IMO, probably best to set motherboard with the PSU aside, and sell them as a set. Heck, maybe even rip out all of the proprietary cables (like the power button and front USB) and wire "generic" ones from another case. Who knows, might even be easier than trying to rewire the old stuff. And this way, you can sell the mobo + PSU + cables as a set, so whoever buys it can wire it in to whatever case they want... and hopefully not waste and ENTIRE E-ATX case for a small mATX mobo.

        Anyways, I really like how the build is coming along though. 2x 8-core CPUs with 16 thr. each and 256 GB of RAM - that's actually quite a power-house.

        Comment


          #5
          Re: Lenovo TS440 to Supermicro X9DAi Conversion

          Originally posted by momaka View Post
          Sad... that an E5-1220 v3 is considered junk nowadays.
          Yes, original HW may only have 8 GB of RAM and 4 core CPU, but that's still plenty decent even today (well, maybe the RAM might be a bit low at 8 GB... though probably more than enough for some version of Linux.)
          I didn't really deem it junk other than for perhaps the proprietary features that I find really annoying. I'll try to find it a new home or build something more its size...it won't end up shredded...just not in this case.

          Originally posted by momaka View Post
          The new HW, of course, is in a completely different league. Very nice!
          A little newer but a nice fit in the case.

          Originally posted by momaka View Post
          And yes, IDK why so many companies have started doing this now: install a tiny motherboard into a huge case with a cubic butt-load of proprietary stuff. It's just.... ugh! like you, it just pisses me off.
          This is becoming the standard versus the exception....but I guess the upside, the motherboards & cases used to be the same way; atleast they started using standard ATX form factors.....which atleast allows case reuse without major surgery, just some wiring trickery....but I am still plotting a PC conversion on one of those heavy solid aluminum MacPro G5 cases....but that's for another thread.

          Originally posted by momaka View Post
          IMO, probably best to set motherboard with the PSU aside, and sell them as a set. Heck, maybe even rip out all of the proprietary cables (like the power button and front USB) and wire "generic" ones from another case. Who knows, might even be easier than trying to rewire the old stuff. And this way, you can sell the mobo + PSU + cables as a set, so whoever buys it can wire it in to whatever case they want... and hopefully not waste and ENTIRE E-ATX case for a small mATX mobo.
          Will be doing exactly that with the exception of the SAS backplane cables. Those will have to be modified and reused, based on Dan's link above (had the information I needed for the power cable but the USB3 is still a mystery). I have an old Lenovo P4 system here, case is micro ATX.....so keep that in mind.

          Originally posted by momaka View Post
          Anyways, I really like how the build is coming along though. 2x 8-core CPUs with 16 thr. each and 256 GB of RAM - that's actually quite a power-house.
          Freight train workstation. I have no plans for it....hope I can sell it and put it back to work.
          <--- Badcaps.net Founder

          Badcaps.net Services:

          Motherboard Repair Services

          ----------------------------------------------
          Badcaps.net Forum Members Folding Team
          http://folding.stanford.edu/
          Team : 49813
          Join in!!
          Team Stats

          Comment


            #6
            Re: Lenovo TS440 to Supermicro X9DAi Conversion

            It's not even complete and it's already going to work. Had a client bring me a WD 'My Book' external HDD. Wouldn't power up, just buzz....bad sign. Disassembled it and found a popped something or other right at the power connector. Silkscreen says 'L20', obviously an inductor of some kind.....there was nothing left of it and I wasn't going to bother trying to repair it, all the customer wanted was the data off it.....

            These are a treat to disassemble, I've never gotten one apart without destroying the housing....and this one was no different.


            The burned coil.


            Next, I plugged the drive into a this system via SATA port....spinup, attempt to register, and spin down....well shit.... It's a 640gb WD Green HDD, so as a last ditch effort, removed the interface board and sure enough, the usual WD corroded contact pads.... Cleaned them up and reinstalled the drive and yay! Seen by BIOS and the OS!!


            Dumped the data off it....and shazam, happy customer!


            Just kind of funny that this machine was put to work before it was even completed. Not a planned operation....it just happened to be on the bench at the time and capable of what I needed done.
            Attached Files
            <--- Badcaps.net Founder

            Badcaps.net Services:

            Motherboard Repair Services

            ----------------------------------------------
            Badcaps.net Forum Members Folding Team
            http://folding.stanford.edu/
            Team : 49813
            Join in!!
            Team Stats

            Comment


              #7
              Re: Lenovo TS440 to Supermicro X9DAi Conversion

              Ok, back to this.... I spent a bit of time consulting the google and apparently this stupid USB3 connector is a Lenovo Server thing, nobody else uses it.....


              This presented a bit of a problem; as reusing the original cable wouldn't be possible and I'd have to fabricate a cable of my own; as this would require a male USB3 19/20-pin on each end and there's no such thing....and no 'gender changer' that I could find.....until some obscure site had this:

              https://www.moddiy.com/products/Leno...Connector.html

              I ordered one....if this works as advertised, I'll be able to reuse the existing/original cable and save myself a lot of grief! I know my time isn't crazy valuable, but if this works (as I think it will) it was 15 bucks well spent!! Given the way some things were worded on that site, I think they're based in the UK....so it may be a little bit for it to get here.....so lets move onto the next task.....which is reworking the rest of the front panel connections.....

              Front panel apart.....


              The pieces....and a better look at that Lenovo USB3 cable...you'll see the one end is that goofy slot and the other is a standard 19/20 pin connector. The other cable is the remainder of the front panel functions; LED's buttons, etc....


              I'm not sure what that gray wire with teh green connector was even for. It didn't route to anything I recognized and obviously wasn't a feature of the X9DAi motherboard.


              Simply depinned/deleted it from the connector.


              Now for the fun....which really turned out to not be all that bad.....but depinning the remainder of the connector from its proprietary motherboard plug.


              I then robbed normal front panel plugs from a junk case and mapped out what went where..... The extra wire shown below is connected to nothing in the PCB, so I snipped it off.


              Tested and working! This motherboard supports 2 NIC's and activity LED headers for each one. The original system however only had a single NIC. There was a dual NIC version, but the PCB and the front bezel didn't support this....and I wasn't replacing the front bezel (if I could even find one) just for a second NIC LED.....so NIC1 is paired to NIC_LED1 on the PCB. If NIC2 is used, there just won't be an activity indicator for it.


              Now a little cleanup. I only washed the front bezel, mainly to get dust out of the crevices.


              The rest of the system just got a good wipedown with a damp microfiber cloth. It really wasn't all that dusty after the air hose blast....and this one isn't as unusual like some of the retro builds are....so yea....clean enough!!


              Now for the SAS cage power cable....


              This one also wasn't that bad when I took a look at what I really had to work with. The connector on the left is amodular plug from the Dell 850W PSU. The connector on the right is the original SAS cage cable. Both are orientated with the latches facing downward.....and the 4-pin fits into the modular 6-pin plug in the left-side of the socket....


              ....but as you can see, the wire orientation is different..... This is where Dan's data came into play....saved me the trouble of firing up the old PSU and verifying voltages versus the wire colors....they were standard; red = 5v and yellow = 12v....but that had to be verified any time dealing with such proprietary nonsense. I depinned the ill-placed wires from the plug.....which if any of you have ever depinned one of these, you know what a joy it is without destroying them....but this aint my first rodeo....sewing needle gets them out in seconds.


              Repinned in the correct config for this PSU:


              ...and tada!!!


              Next up is a little side gap that the standard form factor PSU left versus the original redundant.... It's a narrow gap....but leaving it open would bug me....


              ....so a spare bay cover with no stamping to the rescue!!!


              Trimmed & couple holes drilled, looks like it was born there!!


              Now for some SAS'ery..... The onboard RAID that uses the mini-SAS dongle doesn't support SAS apparently....it'll work fine with any standard SATA, but SAS drives are not recognized.....so I used the original LSI 9240-8i that came with this system.

              I won't go into the gory details, but I updated the controller firmware to the latest one I found on LSI's site (now Broadcom)...and SOB, it was actually older than what Lenovo had on it and rendered the test OS I had installed unbootable....well frack...so I went to Lenovo and as if by some miracle, they had one there that was newer than anything I could find anywhere else and newer than what was originally on it...and it implemented 'secureboot' as well. Flashed (again) and back on track we are.


              An 800gb Sandisk Lightning. I did not do a RAID config with this system, just a standalone drive. If the new owner wants to set up a bunch of RAID's, I'll leave that to him/her/whoever ends up with this...


              ...and Server 2022 Eval installed for testing purposes. I wasn't going to use one of my Enterprise MAK keys on this unless I was keeping it....so for testing purposes, this is the best/easiest way to get it done.


              That's all until the USB3 connector gets here....

              A few screenshots:


              Attached Files
              <--- Badcaps.net Founder

              Badcaps.net Services:

              Motherboard Repair Services

              ----------------------------------------------
              Badcaps.net Forum Members Folding Team
              http://folding.stanford.edu/
              Team : 49813
              Join in!!
              Team Stats

              Comment


                #8
                Re: Lenovo TS440 to Supermicro X9DAi Conversion

                Glad I could help providing the pinouts for the backplane.

                And nice work with the rest of the USB3 and FP stuff - I was looking for a possibility to find a pinout for the USB3 header so I could help you, but the only things I've seen are funny adapters for that PCIEx1-like slot that Lenovo uses (blergh, why does IBM/Lenovo love being the epitome of proprietary? Even Dell wasn't that bad, and even HP was a breeze!) to a standard USB3 header (similar to what you found on that PCB).

                My biggest wonder is if maybe, a internal USB3 cable that has the same plugs on both end (standard USB3 header, not the funky thing Lenovo used on the mainboard end) works with that PCB. It looks like standard USB3 stuff at a first glance - though knowing Lenovo/IBM, it might not be the chance. I remember I had quite some work to do when I first modded my Netvista 6578 from a locked down i815 board to a powerful Epox EP-3VCM mobo w/ VIA694X and a 1GHz P3 Coppermine.

                Didn't even need to replace the PSU as far as I remember (not sure if I did later in its life, as I do remember having a TFX sized 250W FSP unit, whereas the case was SFX).
                I still have the mobo and CPUs, but no longer have the case after I managed to quite cut myself pretty nasty on it. That modded Gateway I've posted in the cheap/free scores is its successor, sorta. That one at least allows standard ATX (though I'm not fully sure, it might also accept extended ATX, around the size of a ECS K7S5A I think?) and the front panel was easy to mod.
                Main rig:
                Gigabyte B75M-D3H
                Core i5-3470 3.60GHz
                Gigabyte Geforce GTX650 1GB GDDR5
                16GB DDR3-1600
                Samsung SH-224AB DVD-RW
                FSP Bluestorm II 500W (recapped)
                120GB ADATA + 2x Seagate Barracuda ES.2 ST31000340NS 1TB
                Delux MG760 case

                Comment


                  #9
                  Re: Lenovo TS440 to Supermicro X9DAi Conversion

                  The little doodiddle adapter got here yesterday. The female end of it looks to be a 4x PCIe slot fabricated into a PCB with a male 20-pin USB3 plug. Crude but lets see how it works.....


                  First task was to trim away the plastic shroud that latched it into the original connector; it obviously won't plug into this one.


                  The crumbs....


                  Snapped in very snugly. The key lined everything up perfect.


                  Now for the acid test.......


                  I heard the chime.......and tada! Sees the drive.


                  The next battle was the adapter interfering with the fan....that was due to it's placement on the motherboard. Deleting the fan would be dumb....so I simply used a short USB3 internal extension cable, which allowed for plenty of clearance.


                  Everything tucked away nicely & cables tied up......


                  ...and this one is done! I have someone really interested in it.....but hasn't come up with the cash as of yet.....so just another goofy one sitting on the shelf....but it's a pretty nice system!
                  Attached Files
                  <--- Badcaps.net Founder

                  Badcaps.net Services:

                  Motherboard Repair Services

                  ----------------------------------------------
                  Badcaps.net Forum Members Folding Team
                  http://folding.stanford.edu/
                  Team : 49813
                  Join in!!
                  Team Stats

                  Comment

                  Working...
                  X