Prepare yourself for another long thread of mine detailing a nearly worthless repair. 
I will start with an NBM-MAT 140 mm squirrel cage fan, model BG1402-B045-P00.
The story:
Back when I worked in the console repair shop in 2012, there was a technician there that didn't know much about electronics at the time. One day, he thought that he could plug a 12V PlayStation 3 fan into the wall to test it and it would work.") He thought it would just spin faster. His logic: spin 10 times faster, because the wall provides 10x more voltage
He thought it would just spin faster. His logic: spin 10 times faster, because the wall provides 10x more voltage  (120V AC here in the US.)
Needless to say, when he attempted to run the fan like that, there must have been a small 4th of July fireworks show. I wasn't there when it happened, but I saw the fan in the trash and asked what was wrong with it and why it was thrown away. He said it was burned. He also gave me another one that he burned in a similar way (more on that in a bit). When he explained what he did, I was shocked and amused at the same time – the guy was dead serious. It was hard to keep a straight face, but nevertheless I explained to him why his idea/experiment failed. Hopefully he remembered. Glad I wasn't a person to give him my computers for repair. But after all, everyone has to start somewhere, right.
Anyways, I took both bad fans with me, even though I wasn't sure what I was going to do with them at the time. They sat in storage for maybe 2-3 years until I had to make an order from Digikey for some parts and decided why not pitch in a few more dollars to see if I could get these fans going.
Granted, one can buy replacement PS3 fans on eBay for around $10, the repair wasn't worth it from an economical stand point. But I decided to do it anyways, mainly to see if those fans were revivable. And I also wanted to have a working PS3 fan, just in case I ever think of a project that might need it.
With all that said, here are some pictures of the fan and the aftermath of being plugged in to 120V AC.
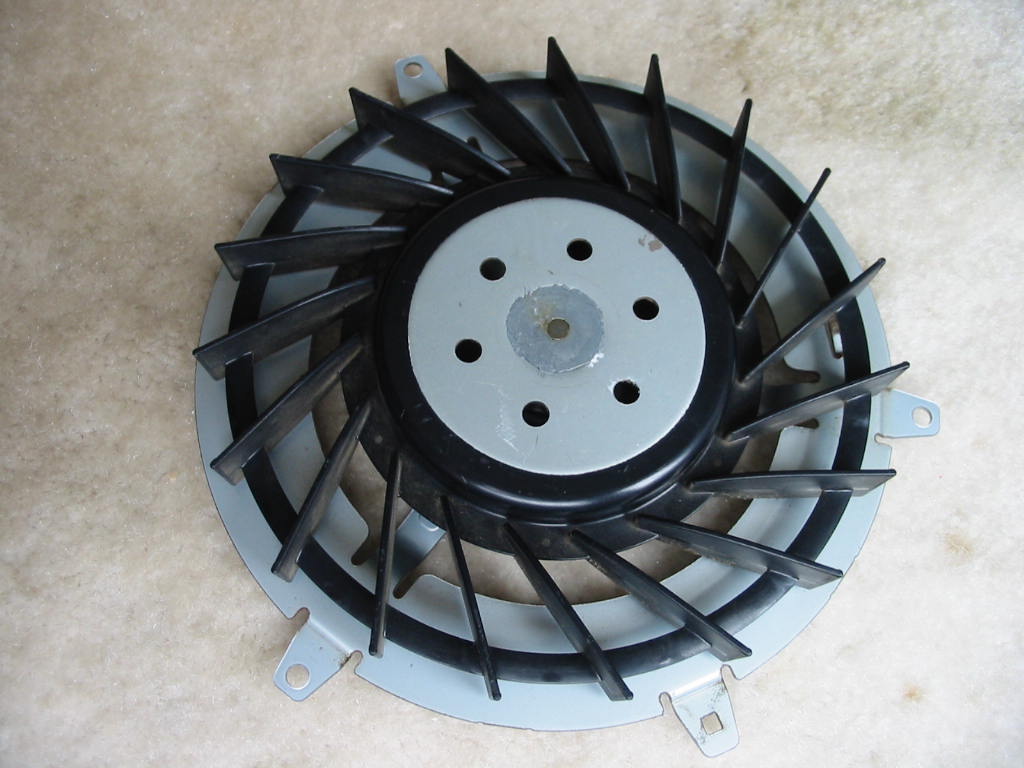
The fan shot:
Label:
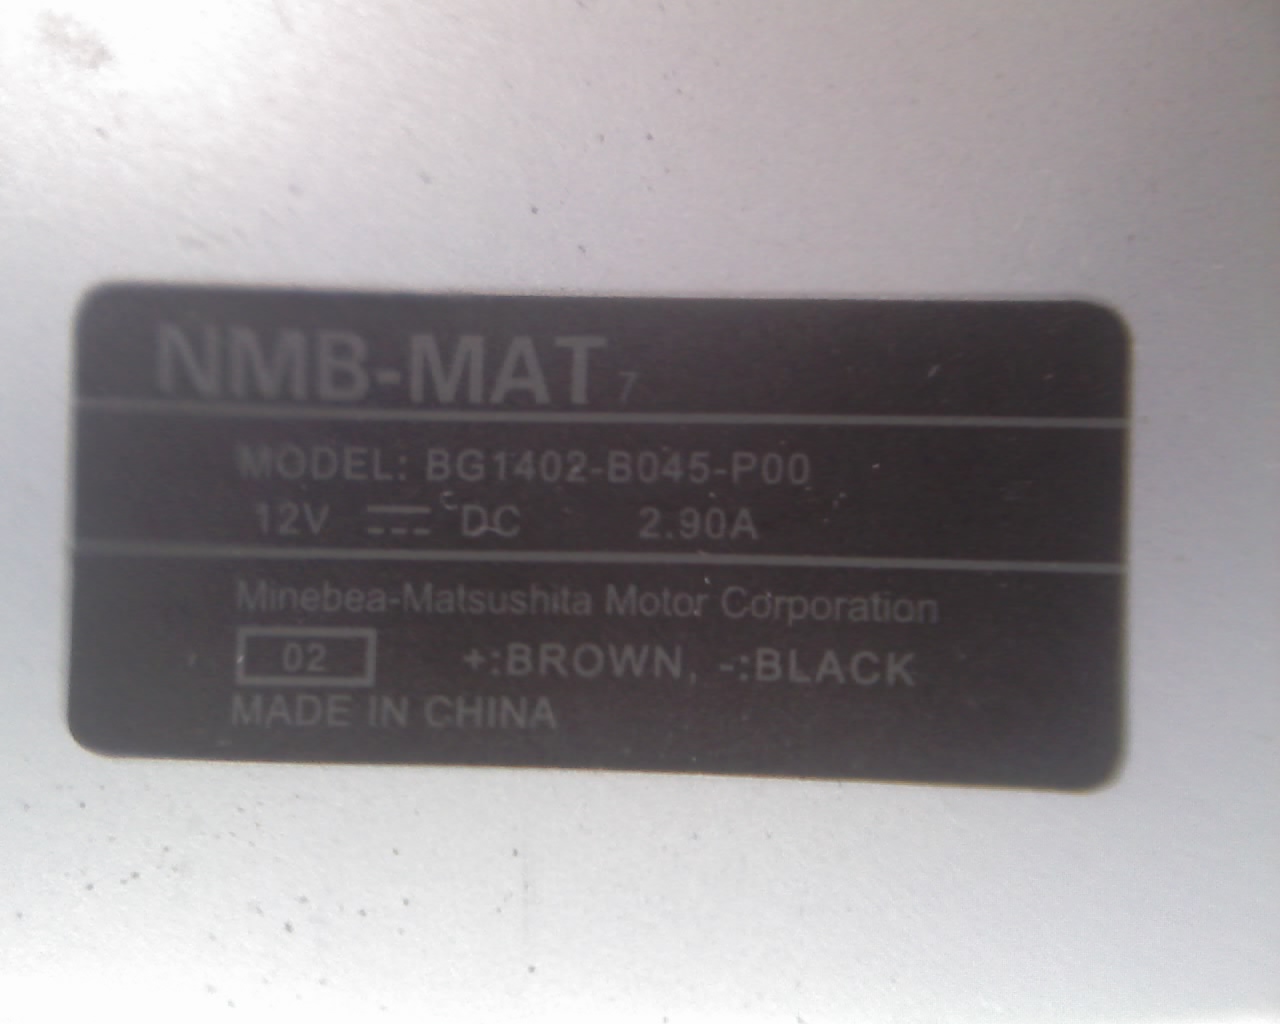
Look at that current rating: 2.9 Amps at 12V! That is almost 35 Watts of wind power!!! I've ran one at full speed out of its cage before, and they are scary.
But now for the even more interesting part: the carnage.
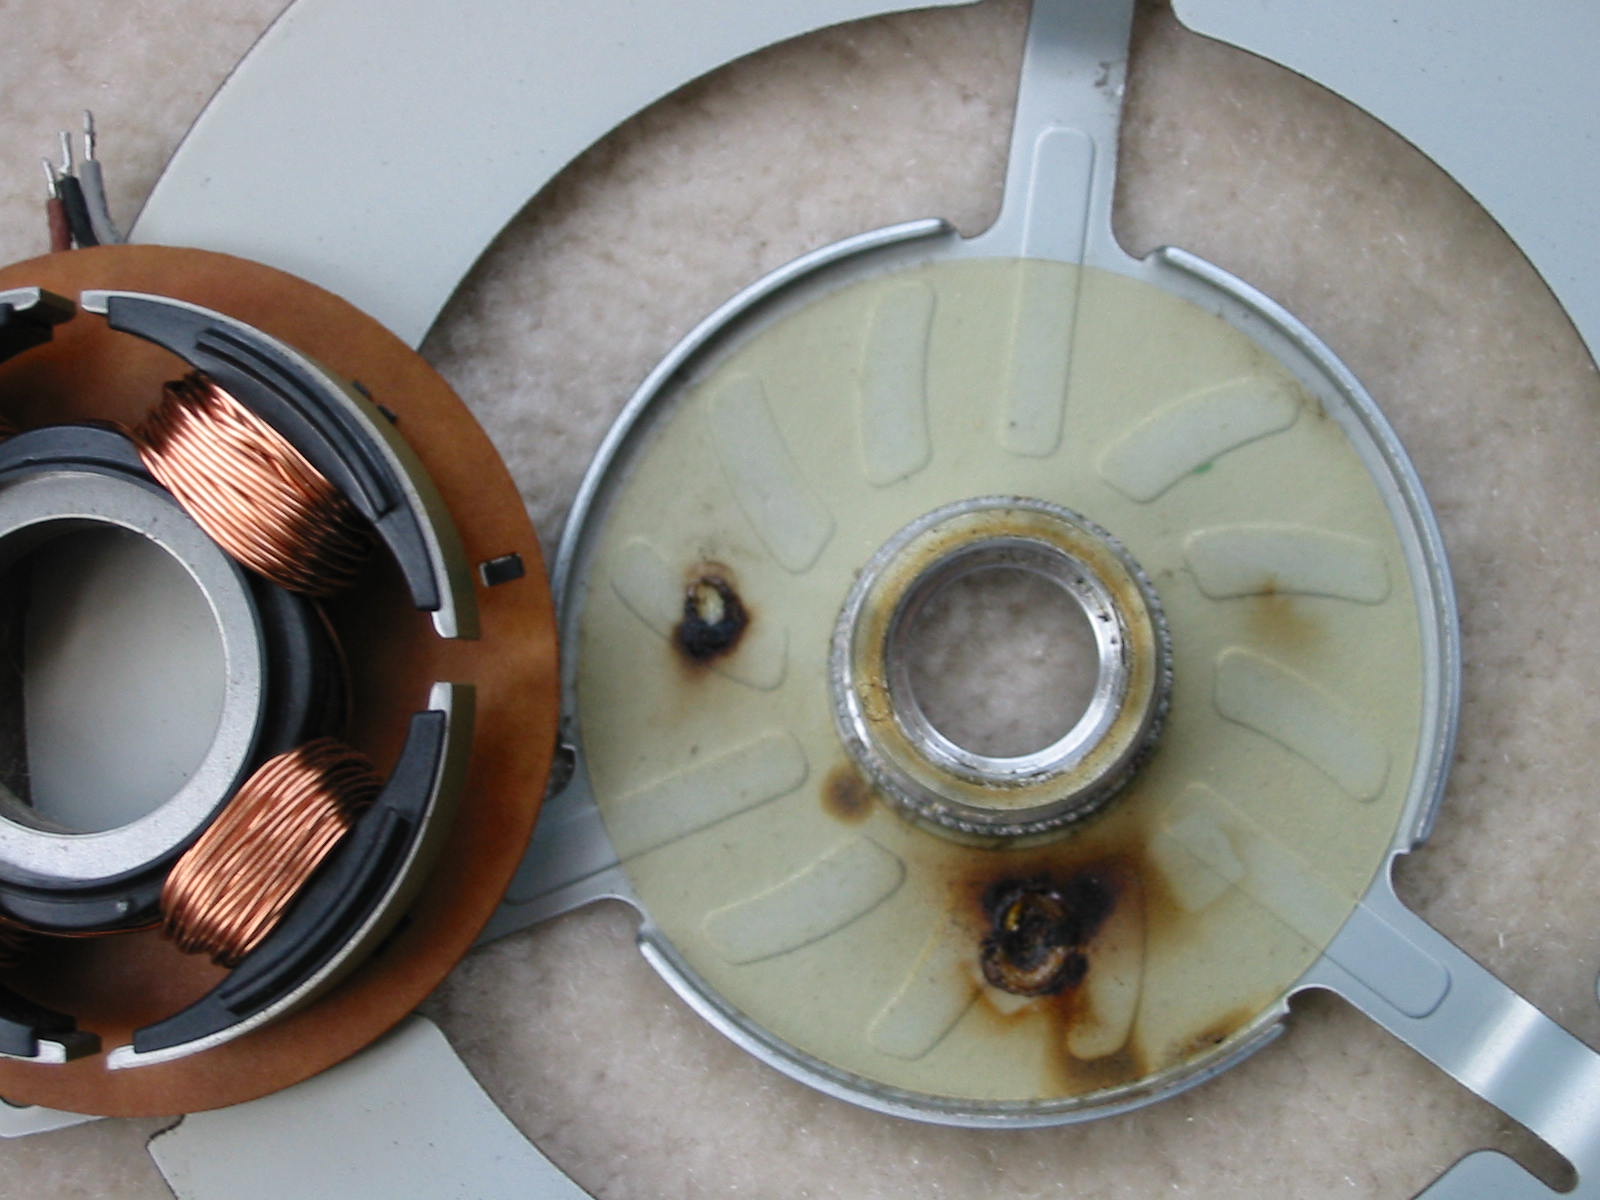
Oh yes! Look at that brown and black sooth. Something really must have released a ton of magic smoke.
Before I move to the next shot, I want to take a moment here to mention how hard it is to take apart one of these fans. If you look at the cage hub and also the stator that goes on top of it – that took a lot of force and creativity to separate them. As you can see, both are made of metal and what makes it worse is that they were heat-pressed together at the factory. To add insult to the injury, there was also a bit of adhesive between them. But why separate them? –Because the fan's PCB is attached to the stator assembly, so there would have been no way to repair the fan if I didn't take it apart.
So how did I take it apart? Answer: heat, ice, and lots of sweat. To elaborate, basically I heated the entire fan assembly with the heat gun to a temperature as high as I could hold with a glove and not get burned. Then, because the stator assembly and cage hub were heat-pressed together, the hub has to be cooled (to shrink it) while the stator assembly is hot (expanded). After heating everything, I fed ice through the hole in the hub with one hand while turning and pulling away with the other hand.
About 10-15 minutes of heating, cooling, and turning, I got it apart. Finally, I was able to see the PCB and its components… or whatever was left of them
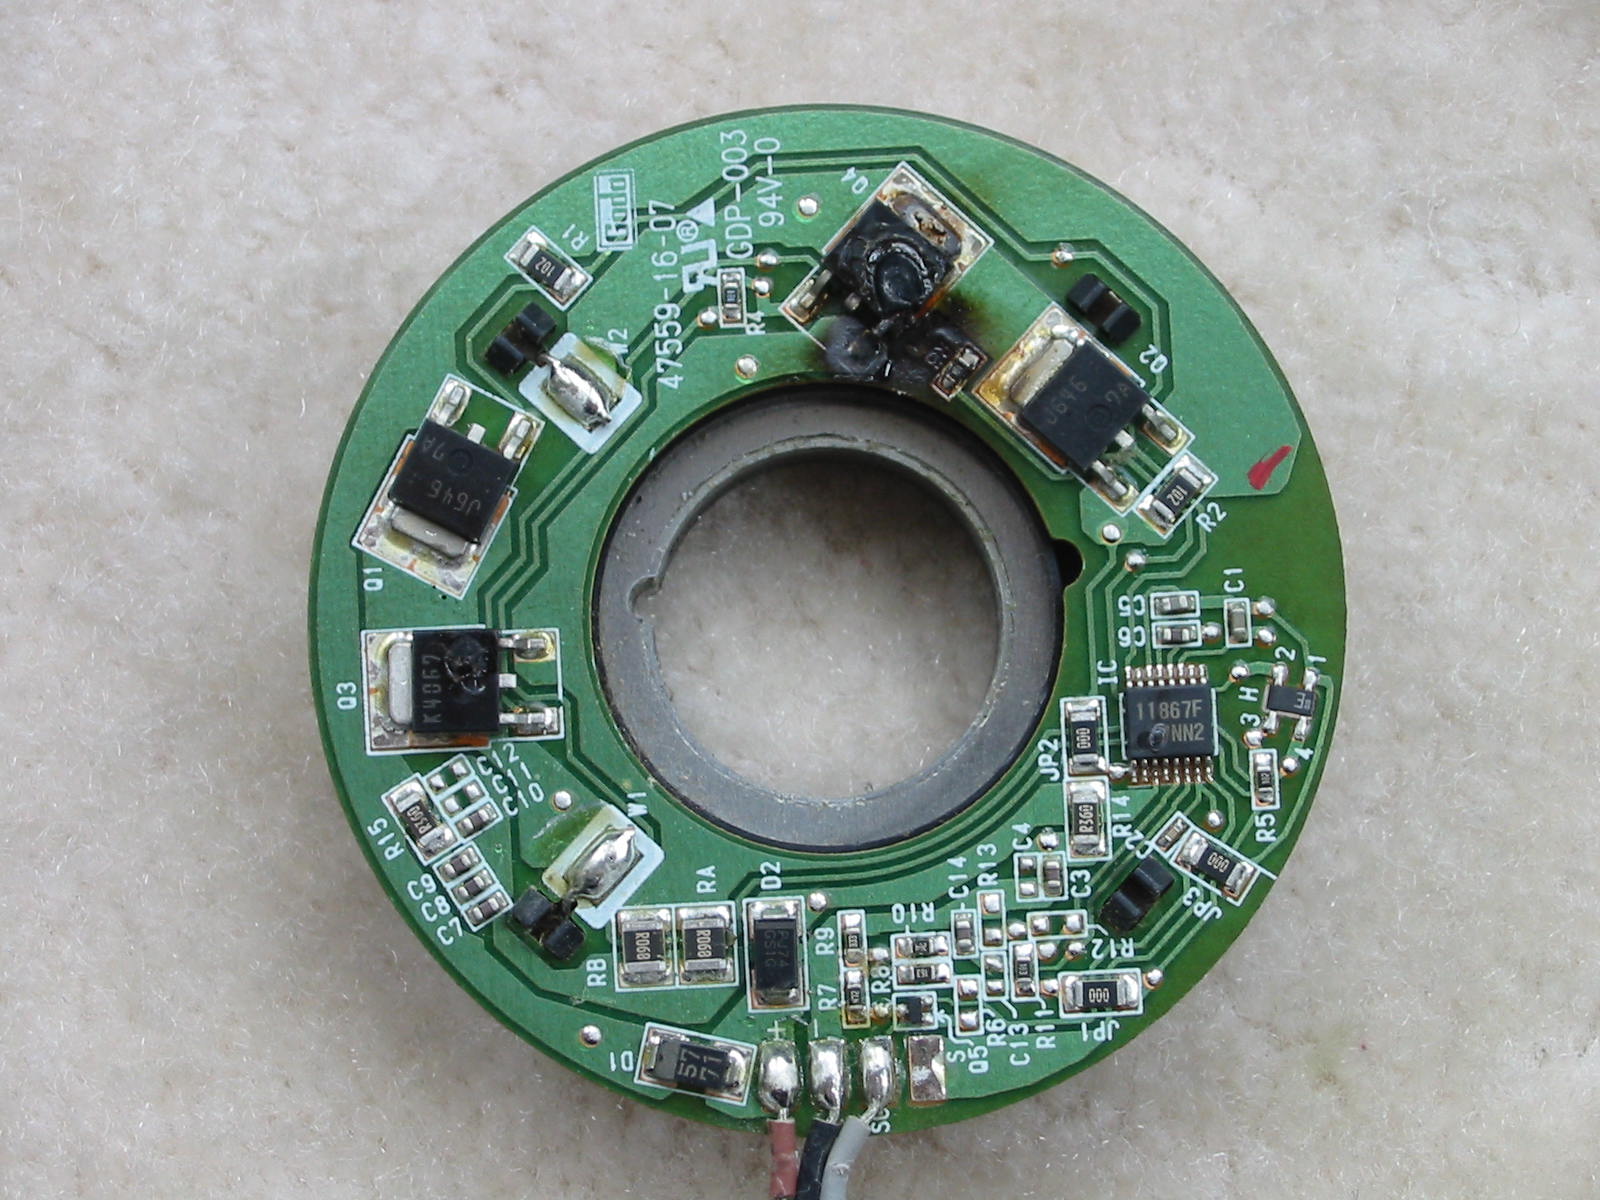
Hmmm... I think I have found the source of the sooth – look at that MOSFET!
Say what now? Did I hear anyone say it doesn't look that bad? Well here is a close-up for you then:
https://www.badcaps.net/forum/attach...1&d=1500759436
And even the controller (a Sanyo LB11867FV single-phase variable speed controller) took a hit:
https://www.badcaps.net/forum/attach...1&d=1500759436
Mmmm. Well done!
That said, it wasn't just one FET and the controller that were bad – ALL of the MOSFETs on the board were shorted on ALL pins. I suppose that is one good reason NOT to plug fans directly in the wall.
Of course, before I could order any parts, I had to find what else was bad. So I started removing components. As soon as I tried to remove the incinerated FET, it just fell apart.
https://www.badcaps.net/forum/attach...1&d=1500759436
But eventually, I got everything that was bad removed.
https://www.badcaps.net/forum/attach...1&d=1500759436
Worth noting here is that SMD resistor R15 at the top was also open. It is in series with a bunch of ceramic caps, which filter power to the FETs and reduce EMI from going back to whatever the fan is powered from. I'm not sure why NMB put the resistor in series with those caps, as that essentially increases their ESR to the value of the resistor (it was a 0.036 Ohm resistor, if I am not mistaken). In any case, had the caps been connected directly without it, there is a chance they could have taken the hit instead of the MOSFETs and possibly saved everything else. Judging by the blown resistor, looks like they did short out from the over-voltage too, which is why R15 opened. However, my multimeter indicated they were fine - and they were, indeed.
As such, I replaced R15 with a jumper wire (figured it wouldn't hurt anything) and also the rest of the blown components: that is, four MOSFETs (two 2SK4067 N-channel FETs and two 2SJ646 P-channel FETs) and the controller. Miraculously, everything else was fine, including the Source resistors for the FETs. For the N-ch FETs, I used two 4813NH units from a Xbox 360 motherboard (they look burned because they were removed with a blow torch as an experiment ) and for the P-ch FETs, I used P4051L - not exact replacements, but close enough.
Here are the results:
https://www.badcaps.net/forum/attach...1&d=1500759537
https://www.badcaps.net/forum/attach...1&d=1500759537
https://www.badcaps.net/forum/attach...1&d=1500759537
https://www.badcaps.net/forum/attach...1&d=1500759537
That one FET burned so bad that even the trace for its Source pad was burned. As such, I had to bridge it with some wire and solder. It is a miracle the Source resistors survived.
It also took a bit of eye-strain to hand-solder that controller, as this was my second SSOP IC I soldered by hand (SOIC are much easier). I do have hot air as well, but I never got to like using hot air. When doing these SSOP/TSOP packages, make sure your iron has almost no solder on its tip. Even a tiny bit too much can cause a bridge. Drag soldering was not possible here, but I will go over the details of why a little later below.
After all of this, I put the fan back together (but without gluing the stator to the cage hub). Unfortunately, during disassembly a long time ago, I had damaged the metal c-clip that held the rotor's shaft to the fan. So I used a good old friend here: Mr. Paper Clip.
https://www.badcaps.net/forum/attach...1&d=1500759537
(The bearing shield also had some damage, but the bearing was okay.)
Finally, the moment I've been waiting for: I plugged the fan into 12V with the PWM wire grounded and measured the current – it was drawing just a few mA and not spinning, as it should. I then connected the PWM wire to a PWM circuit based on a 555-timer and started cranking up. Result: IT WORKS!
On that note, I strongly discourage anyone from running these fans at full speed when they are removed from their PS3 housing. The rotor spins very fast at full speed and can hurt you or damage itself if it gets in contact with something. Always control the speed through a PWM controller on these fans!
I will start with an NBM-MAT 140 mm squirrel cage fan, model BG1402-B045-P00.
The story:
Back when I worked in the console repair shop in 2012, there was a technician there that didn't know much about electronics at the time. One day, he thought that he could plug a 12V PlayStation 3 fan into the wall to test it and it would work.
He thought it would just spin faster. His logic: spin 10 times faster, because the wall provides 10x more voltage (120V AC here in the US.)Needless to say, when he attempted to run the fan like that, there must have been a small 4th of July fireworks show.
I wasn't there when it happened, but I saw the fan in the trash and asked what was wrong with it and why it was thrown away. He said it was burned. He also gave me another one that he burned in a similar way (more on that in a bit). When he explained what he did, I was shocked and amused at the same time – the guy was dead serious. It was hard to keep a straight face, but nevertheless I explained to him why his idea/experiment failed. Hopefully he remembered. Glad I wasn't a person to give him my computers for repair. But after all, everyone has to start somewhere, right. Anyways, I took both bad fans with me, even though I wasn't sure what I was going to do with them at the time. They sat in storage for maybe 2-3 years until I had to make an order from Digikey for some parts and decided why not pitch in a few more dollars to see if I could get these fans going.
Granted, one can buy replacement PS3 fans on eBay for around $10, the repair wasn't worth it from an economical stand point. But I decided to do it anyways, mainly to see if those fans were revivable. And I also wanted to have a working PS3 fan, just in case I ever think of a project that might need it.
With all that said, here are some pictures of the fan and the aftermath of being plugged in to 120V AC.
The fan shot:
Label:
Look at that current rating: 2.9 Amps at 12V!
That is almost 35 Watts of wind power!!! I've ran one at full speed out of its cage before, and they are scary.But now for the even more interesting part: the carnage.
Oh yes! Look at that brown and black sooth. Something really must have released a ton of magic smoke.
Before I move to the next shot, I want to take a moment here to mention how hard it is to take apart one of these fans. If you look at the cage hub and also the stator that goes on top of it – that took a lot of force and creativity to separate them. As you can see, both are made of metal and what makes it worse is that they were heat-pressed together at the factory. To add insult to the injury, there was also a bit of adhesive between them. But why separate them? –Because the fan's PCB is attached to the stator assembly, so there would have been no way to repair the fan if I didn't take it apart.
So how did I take it apart? Answer: heat, ice, and lots of sweat. To elaborate, basically I heated the entire fan assembly with the heat gun to a temperature as high as I could hold with a glove and not get burned. Then, because the stator assembly and cage hub were heat-pressed together, the hub has to be cooled (to shrink it) while the stator assembly is hot (expanded). After heating everything, I fed ice through the hole in the hub with one hand while turning and pulling away with the other hand.
About 10-15 minutes of heating, cooling, and turning, I got it apart. Finally, I was able to see the PCB and its components… or whatever was left of them
Hmmm... I think I have found the source of the sooth
– look at that MOSFET! Say what now? Did I hear anyone say it doesn't look that bad? Well here is a close-up for you then:
https://www.badcaps.net/forum/attach...1&d=1500759436
And even the controller (a Sanyo LB11867FV single-phase variable speed controller) took a hit:
https://www.badcaps.net/forum/attach...1&d=1500759436
Mmmm. Well done!
That said, it wasn't just one FET and the controller that were bad – ALL of the MOSFETs on the board were shorted on ALL pins. I suppose that is one good reason NOT to plug fans directly in the wall.
Of course, before I could order any parts, I had to find what else was bad. So I started removing components. As soon as I tried to remove the incinerated FET, it just fell apart.
https://www.badcaps.net/forum/attach...1&d=1500759436
But eventually, I got everything that was bad removed.
https://www.badcaps.net/forum/attach...1&d=1500759436
Worth noting here is that SMD resistor R15 at the top was also open. It is in series with a bunch of ceramic caps, which filter power to the FETs and reduce EMI from going back to whatever the fan is powered from. I'm not sure why NMB put the resistor in series with those caps, as that essentially increases their ESR to the value of the resistor (it was a 0.036 Ohm resistor, if I am not mistaken). In any case, had the caps been connected directly without it, there is a chance they could have taken the hit instead of the MOSFETs and possibly saved everything else. Judging by the blown resistor, looks like they did short out from the over-voltage too, which is why R15 opened. However, my multimeter indicated they were fine - and they were, indeed.
As such, I replaced R15 with a jumper wire (figured it wouldn't hurt anything) and also the rest of the blown components: that is, four MOSFETs (two 2SK4067 N-channel FETs and two 2SJ646 P-channel FETs) and the controller. Miraculously, everything else was fine, including the Source resistors for the FETs. For the N-ch FETs, I used two 4813NH units from a Xbox 360 motherboard (they look burned because they were removed with a blow torch as an experiment
) and for the P-ch FETs, I used P4051L - not exact replacements, but close enough. Here are the results:
https://www.badcaps.net/forum/attach...1&d=1500759537
https://www.badcaps.net/forum/attach...1&d=1500759537
https://www.badcaps.net/forum/attach...1&d=1500759537
https://www.badcaps.net/forum/attach...1&d=1500759537
That one FET burned so bad that even the trace for its Source pad was burned. As such, I had to bridge it with some wire and solder. It is a miracle the Source resistors survived.
It also took a bit of eye-strain to hand-solder that controller, as this was my second SSOP IC I soldered by hand (SOIC are much easier). I do have hot air as well, but I never got to like using hot air. When doing these SSOP/TSOP packages, make sure your iron has almost no solder on its tip. Even a tiny bit too much can cause a bridge. Drag soldering was not possible here, but I will go over the details of why a little later below.
After all of this, I put the fan back together (but without gluing the stator to the cage hub). Unfortunately, during disassembly a long time ago, I had damaged the metal c-clip that held the rotor's shaft to the fan. So I used a good old friend here: Mr. Paper Clip.
https://www.badcaps.net/forum/attach...1&d=1500759537
(The bearing shield also had some damage, but the bearing was okay.)
Finally, the moment I've been waiting for: I plugged the fan into 12V with the PWM wire grounded and measured the current – it was drawing just a few mA and not spinning, as it should. I then connected the PWM wire to a PWM circuit based on a 555-timer and started cranking up. Result: IT WORKS!
On that note, I strongly discourage anyone from running these fans at full speed when they are removed from their PS3 housing. The rotor spins very fast at full speed and can hurt you or damage itself if it gets in contact with something. Always control the speed through a PWM controller on these fans!
Attached Files
 , and this time it was me that did it.
 And all of this was due to the popcorned board making the controller not sit evenly on the pads. I actually had a ton of trouble getting the (new) new controller soldered because of the damage some of the pads took from the popcorned PCB. This is why I am glad I did not attempt to drag-solder it. Had I done that, who knows how much worse the PCB would have gotten. Phenolic boards that have picked up moisture are extremely sensitive to high heat, so it is best to solder things as quickly as possible.

Comment